AWS Cloud Resume Challenge
Host your resume in the cloud using AWS
Introduction
The goal of this challenge is to get your resume hosted in the cloud while building foundational knowledge in important skills, such as infrastructure as code, CI/CD pipelines, databases, DNS, APIs, Python, and much more. What I enjoyed the most about this challenge is that it provides a guideline for what steps you need to take but doesn’t hold your hand throughout the process. For example, it will tell you that your website needs to use HTTPS and that Amazon CloudFront can help with that but won’t walk you through the process step by step. It’s up to you to do your own research and read documentation to get to your end result. I feel like being forced to struggle a little really helps you learn better.
This challenge starts off relatively simple with your resume hosted on a basic Amazon S3 static website but really increases in complexity as you continue. You’ll acquire your own custom domain and use Amazon’s Route 53 to configure DNS for your domain and subdomains (my domain was through Squarespace, so that brought its own set of challenges). To ensure your website uses HTTPS for security purposes, you will use AWS Certificate Manager to provision an SSL/TLS certificate. You’ll use Amazon’s CloudFront as a content delivery network (CDN) service to host the content of your S3 bucket and increase your website’s scalability. DynamoDB and AWS Lambda@Edge will be used as the backend to update a visitor counter. GitHub will be used for source control and GitHub Actions will serve as our CI/CD pipeline. Lastly, you will rebuild the entire project using Terraform to get more familiar with infrastructure as code (IaC).
If you want to learn more about the AWS cloud resume challenge, be sure to visit: https://cloudresumechallenge.dev/
Part 1: Creating your Static Website
You’ll need to convert your resume from a Word doc/PDF into HTML. I won’t really go into details on how to do this, as it’s fairly simple and you can easily look it up. To make sure we don’t just see raw HTML when we open our webpage, we’ll use some CSS to style it. It doesn’t have to be anything fancy, and you can honestly just copy some CSS snippets from codepen.io to help you style it.
I used VSCode as my IDE of choice, as that’s what I’m familiar with. You’ll want to create an index.html and style.css file where you’ll add your HTML and CSS code for your website. Once you’ve converted your resume into HTML and added some basic styling, it’s time to create an S3 bucket and upload our files.
Amazon’s S3 is an object storage service that allows you to store and retrieve any amount of data from anywhere. For our purposes, we’ll be uploading our index.html and style.css files and using it to host our static website. You’ll first need to create an AWS account. Amazon offers a free tier that will be perfect for this project.
Once you have created your AWS account, search for S3 in the search bar and head over to the S3 dashboard. Create your first bucket and make sure to name it your domain’s name (i.e. example.com). Leave the rest of the settings as default and create the bucket. Under your bucket’s Properties tab, enable Static website hosting and upload your files. Next, go into Permissions and disable all the options under Block public access. This will allow us to access our bucket over the internet. Amazon will give you a custom bucket policy that you’ll need to paste into the Bucket policy box. You will also want to create another bucket for the www. subdomain (name the bucket www.example.com) and set it to redirect to your apex domain. This can be done in Static website hosting under your bucket’s Properties tab.
Congratulations! You now have your resume hosted on a static S3 website. Amazon will provide you a link to your endpoint that will look something like this:
www.example-bucket.com.s3-website.region.amazonaws.com
In the next steps, we will route our S3 bucket to our own custom domain and enable HTTPS using Route 53 and CloudFront.
Part 2: Route 53 & CloudFront
This part proved to be quite challenging, and I had to do a lot of research to get it all configured. If you don’t already have your own custom domain, I recommend going through Amazon’s Route 53 and purchasing one. In my case, I purchased my domain years ago through Squarespace domains (previously Google Domains) and had to do some configuring on their dashboard to allow it to use Route 53’s nameservers.
If you bought your domain through Route 53, then it will automatically create a hosted zone for you. If not, create one and name it after your domain (i.e. example.com). Once it’s created, you will see some records already added for you. In my case, I had to copy the four nameservers created under the NS record, go into Squarespace’s dashboard, and replace Squarespace’s nameservers with the ones provided by Route 53. This will allow us to use Route 53 to handle our DNS services.
Now that we have our DNS configured, it’s time to move on to CloudFront. Amazon’s CloudFront will allow us to do a number of things that we can’t do with S3 alone:
- TLS which will allow our website to use HTTPS
- Redirect from HTTP to HTTPS
- Cache our website to reduce the number of S3 GET requests and provide a faster website
- Web Application Firewall (WAF) to block malicious web traffic
- Lambda@Edge which will allow us to execute functions to customize the content on our website (Lambda@Edge can do a lot more than this)
CloudFront is a content delivery network (CDN) and it will allow the delivery of content at low latency and high transfer speed globally. Our S3 bucket is local to whichever region we specified; in my case, I chose US West (N. Cali). This means that a user in Europe, or anywhere else on the globe, would need to connect to this specific server, which would cause slow load times.
Part 3: The Backend
We want to make a counter on our website that tallies the number of visitors the website has received. This counter will be stored in a database as opposed to local storage. We will use Amazon’s DynamoDB as our database.
Go into the DynamoDB dashboard and create a new table. Name the table visitorCounts and name the partition key id (choose whatever names you want for the table/partition key; this is just what I went with). Next, add an item to your table and give it an id of 1. Add a new attribute and label it visitors with a value of 1 as well.
Once our table is set up, we’ll want to create API functionality in order to fetch our data from the table through an API instead of directly accessing the table. We will use Lambda services for this.
Go into Lambda and create a new function from scratch. Under Additional Configuration, check the box for Enable function URL, set Auth type to NONE, and configure CORS. A function URL will allow us to use the URL instead of creating an API Gateway. We will configure CORS to whitelist our domain so that only our domain will be able to fetch data through our API.
Here is the code we will be using for the function:
1
2
3
4
5
6
7
8
9
10
11
12
import json
import boto3
dynamodb = boto3.resource('dynamodb')
table = dynamodb.Table('visitorCounts')

def lambda_handler(event, context):
    response = table.get_item(Key={'id': '1'})
    visitors = response['Item']['visitors']
    visitors = visitors + 1
    print(visitors)
    response = table.put_item(Item={'id': '1', 'visitors': visitors})
    return visitors
We used get_item to retrieve the item with id = 1.
Next, we set the visitors variable to the current visitor count in our DynamoDB table.
Lastly, we increment the current visitor count by 1 and update the table with the new count using put_item.
Important: If you are receiving an “Internal Server Error” when testing your function, make sure the following are true:
- Ensure your capitalization is correct. “Table”, “Key”, and “Item” are case-sensitive.
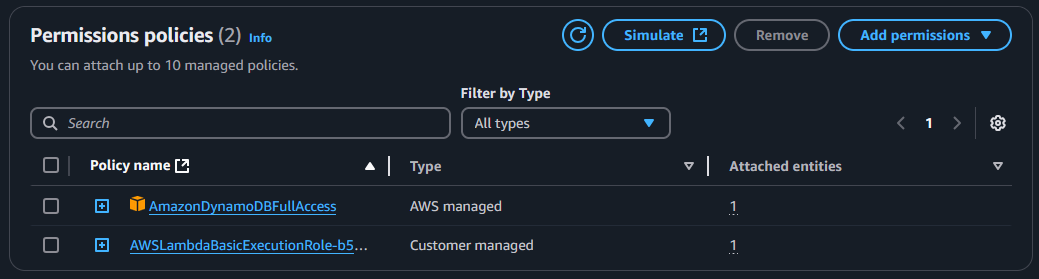
- Add permission for the DynamoDB table: In your function, go to Configuration > Permissions, click the link under Role name, and add full access permissions for DynamoDB.
Now that our table and function are created, we need to write some JavaScript in order to call our function and update the counter on our frontend.
Here’s the JavaScript that I used:
1
2
3
4
5
6
7
8
9
10
const visitCount = document.querySelector(".visitor-count");
async function updateCount() {

    let response = await fetch("your function URL goes here");
    let count = await response.json();
    visitCount.innerHTML = ` Visitors: ${count}`;

}

updateCount();
You’ll also want to make sure that you have some code in your HTML that will display your visitor counter. You can add the following anywhere in your HTML to display the count:
1
<div class="visitor-count">Loading...</div>
Feel free to place it wherever you’d like and style it to your preference.
Part 4: CI/CD
You’ll want to create a GitHub repository and upload your files to it (index.html, style.css, scripts.js, etc.). I put these files in a folder called website and uploaded that to GitHub.
Next, create a directory called .github/workflows in your repository’s root directory. In this directory, we’ll create a YAML file and add our configurations to it:
1
2
3
4
5
6
7
8
9
10
11
12
13
14
15
16
17
18
19
20
21
name: Update Website in S3 Bucket

on:
  push:
    branches:
    - main

jobs:
  deploy:
    runs-on: ubuntu-latest
    steps:
    - uses: actions/checkout@master
    - uses: jakejarvis/s3-sync-action@master
      with:
        args: --follow-symlinks --delete
      env:
        AWS_S3_BUCKET: $
        AWS_ACCESS_KEY_ID: $
        AWS_SECRET_ACCESS_KEY: $
        AWS_REGION: 'us-west-1'   # optional: defaults to us-east-1
        SOURCE_DIR: 'website'     # optional: defaults to entire repository
For SOURCE_DIR, change it to whatever the name is for the folder containing your files. Also, remove --acl public-read from the args, as our S3 bucket doesn’t use an ACL.
In order for GitHub Actions to gain access to our S3 bucket, we’ll need to generate access keys in AWS Identity and Access Management (IAM) and pass those access keys along to GitHub Actions.
First, create a new user in AWS IAM and assign this user the “AmazonS3FullAccess” policy. We will be using this user only for programmatic access and won’t need to create a password. Once the user is created, generate the access key ID and secret access key.
Back on GitHub, go to your repository’s Settings > Secrets and variables > Actions and create three new secrets:
AWS_S3_BUCKET: This will be the name of your S3 bucket.AWS_ACCESS_KEY_ID: This will be the access key ID you generated in AWS IAM.AWS_SECRET_ACCESS_KEY: This will be the secret access key generated in AWS IAM.
Once you save your files and push them to your repo, you should see the following under the Actions tab:

If the action was successful, your S3 bucket will be updated anytime you push any commits to your GitHub repo. You can test this by updating your HTML or CSS files and then checking your live website. It might take a couple of minutes for your live website to update, as CloudFront will cache your website for some time before updating it.
Part 5: Infrastructure as Code (IaC)
This step was quite the monumental task for someone that knew very little about IaC. We’ll essentially tear down everything we’ve created so far and rebuild it through Terraform. You can choose to either tear down everything or just a small portion, such as your S3 bucket, and rebuild it. Either way, it’s good practice and probably the best way to get hands-on experience with IaC.
So what is IaC or Infrastructure as Code? According to ChatGPT, IaC is the practice of managing and provisioning IT infrastructure (like servers, networks, databases, and other resources) through machine-readable configuration files, rather than through manual interactions with the tools. Through IaC, we can manage and define our infrastructure in code, which allows us to automate the process of provisioning, management, and teardown of our infrastructure. For this project, I used Terraform to handle my IaC, but you can choose whatever tool you’d like, and the principles will apply.
First, you’ll need to install Terraform. HashiCorp has great instructions on how to install Terraform on all platforms on their website. Once you get Terraform installed, you’ll need to create an Infrastructure folder outside of your website folder and create two files within it: main.tf and provider.tf.
In the provider.tf file is where we will specify what providers we’ll be provisioning resources for (in our case, it’s AWS). Here is a snippet of the code I used:
1
2
3
4
5
6
7
8
9
10
11
12
13
terraform {
    required_providers {
        aws = {
            version = ">=5.8.3"
            source = "hashicorp/aws"
        }
    }
}
provider "aws" {
    access_key = "YOUR_ACCESS_KEY"
    secret_key = "YOUR_SECRET_KEY"
    region = "us-west-1"
}
Under the provider block, you’ll need to grant Terraform access to your AWS account. This can be done either through creating a separate IAM user (do not use your root account) and generating an access key or installing the AWS CLI tool and authenticating an account through it. I initially used access keys but later switched to the AWS CLI, as it is more secure. You can look up how to install and configure the AWS CLI tool yourself—it’s fairly simple.
In the main.tf file is where the core of your IaC code will go. This is where you’ll provision your S3 bucket, configure IAM roles, assign IAM policies, etc. I’ll provide an example of what this will look like below:
1
2
3
4
5
6
7
8
resource "aws_s3_bucket" "example" {
  bucket = "my-tf-test-bucket"

  tags = {
    Name        = "My bucket"
    Environment = "Dev"
  }
}
In this code, the resource we are provisioning is aws_s3_bucket, and the "example" is what we’ll name that resource in our code so that we can reference it later. Note that this isn’t the name of our bucket but what we’ll call that resource in our Terraform code. These resources also have a set of arguments that they take (i.e., bucket and tags) that will allow us to configure the resource. These resources and arguments can be found on HashiCorp’s website and are available for all of the providers. I won’t go into detail on how to provision every resource—that’s something you can do on your own. Referencing the HashiCorp AWS documents will definitely help you with this.
Once you have your files ready, run the following command in the terminal:
terraform init
Make sure you run this command in the correct folder (the folder where all your Terraform files are). This will initialize your Terraform working directory and download all the necessary plugins for your infrastructure providers.
Next, run the terraform plan command. This will show you an overview of the changes that will be made to your infrastructure and its configurations.
Lastly, run the terraform apply command to apply the changes that you have made to your infrastructure/configurations.
You will very likely run into errors when you run the previous commands. A majority of these errors will have to do with AWS IAM. The AWS user that we previously created to interact with Terraform will not have access to do everything that we want it to do. It’s up to you to grant the user the correct roles and permissions that it needs. The error codes will usually specify what permissions the user is lacking.
Here are some other useful Terraform commands:
terraform validate: Checks the syntax of your Terraform configuration files.terraform destroy: Deletes the infrastructure defined in your Terraform configuration.terraform fmt: Formats your Terraform configuration files to a consistent style.
One important thing to note about Terraform is the Terraform state. Terraform state is a JSON file that acts as a persistent record of your infrastructure, linking the resources defined in your Terraform configuration files to their real-world counterparts. It’s crucial for Terraform to understand what resources exist, how they are related, and how to modify them. The state is how Terraform determines what resources need to be created, updated, or destroyed during each run. It’s why Terraform doesn’t constantly create multiple instances of the same resources every time you run it.
Conclusion
Now that you have gained some hands-on experience with building your infrastructure through code, that marks the end of this project. You can continue to expand upon this project and really make it your own. I decided I wanted to use Jekyll for my website, which has an array of premade themes. Getting the Jekyll site hosted on AWS and configuring the CI/CD pipeline for its backend was fun and challenging. I’ll have a separate write-up about it at a later date.
Anyways, thanks for following along!