Active Directory Home Lab
Set up Active Directory on a Windows Server 2022 VM and connect a Windows 10 VM to the domain
Introduction
I realized that in my career as an IT Technician, I had experience serving as the administrator for an Active Directory Domain Controller, but never had the opportunity to set up Active Directory from scratch. In this lab we will set up and configure Active Directory on a virtual machine (VM) using VMware Workstation. We will also set up client VM’s running Windows 10, that we will join to the Active Directory domain.
Tools Used
- VMware Workstation Pro (you can substitute this for your Hypervisor of choice)
- Windows Server 2022
- Windows 10
- Active Directory Domain Services
Important
- You can substitute the tools mentioned above for any other alternatives. While the menu’s and steps taken might differ slightly, the fundamental concepts are the same.
- For this lab to work, you NEED to enable virtualization in your motherboard’s BIOS. Without this, you cannot start the virtual machines. Please do your own research on how to enable this for your respective motherboard.
Setting up Windows Server on VMware Workstation
To begin, we will first configure our hypervisor for our Windows Server. Start by opening VMware Workstation Pro and clicking “Create a New Virtual Machine.” We will go with the “Typical” configuration option. 
Instead of selecting the Windows Server 2022 iso we previously downloaded, we will select “I will install the operating system later.” and click next. 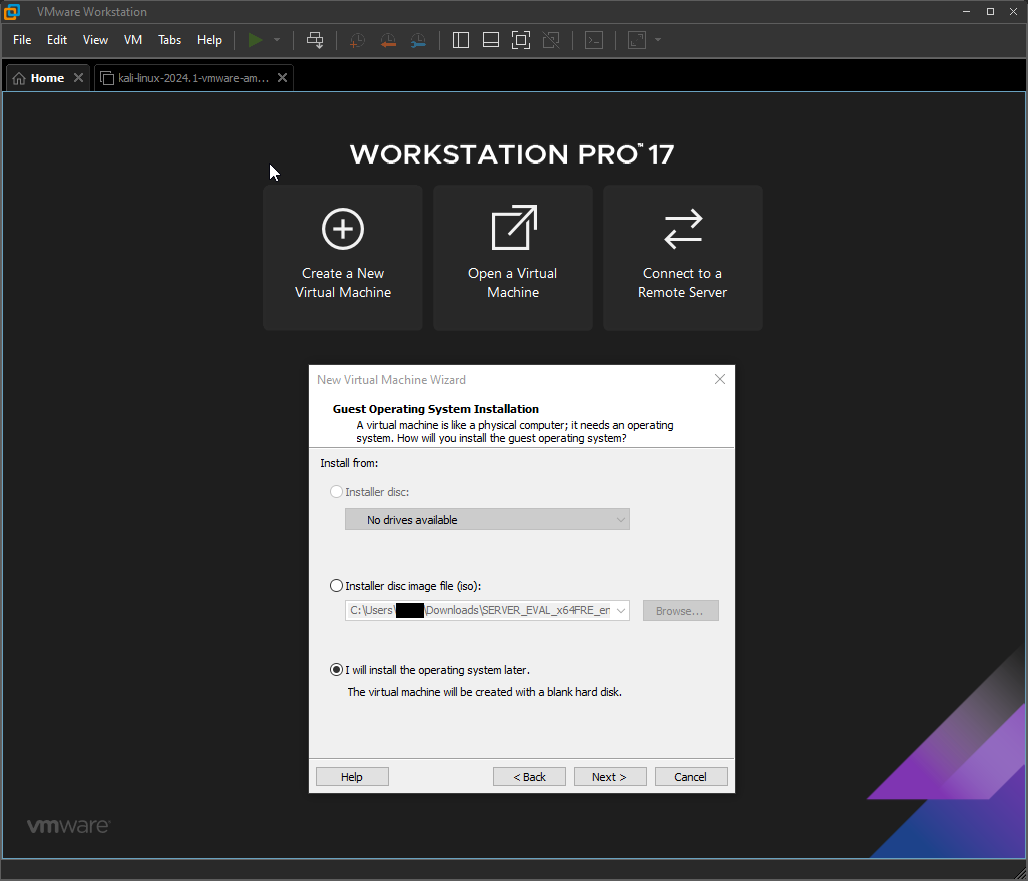
Make sure to select “Microsoft Windows” and select “Windows Server 2022” from the drop down menu. 
Name the VM whatever you’d like. In my case, I just named it “Windows Server 2022.” You will also want to select where you want the VM to be installed. You can go with the default setting or pick a specific drive of your choice. 
Leave the disk size on the recommended, and select the single file option. 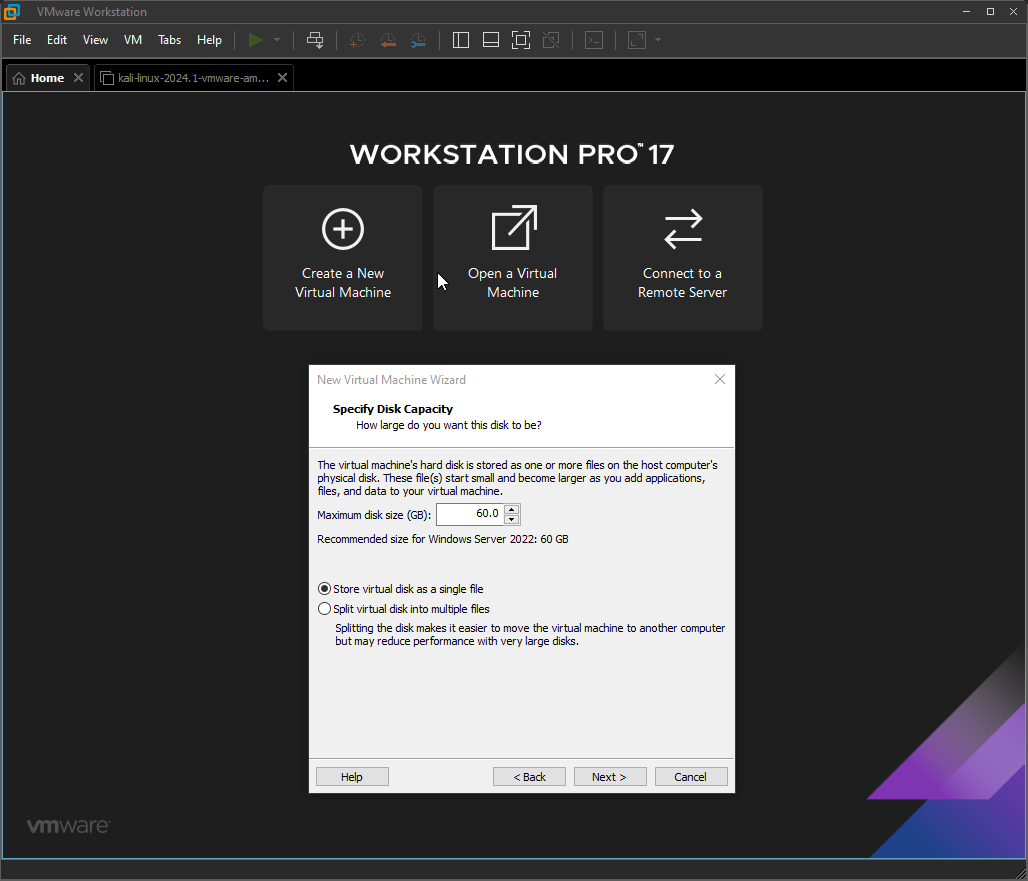
Before we click “Finish” we will want to customize our hardware. 
I opted for 8GB of memory and 4 cores for the processor. You will want to configure this based on your computer’s specs. Note: setting these values too might will lead to performance drops on your host PC. 
Go ahead and select the Windows Server 2022 ISO we downloaded earlier and then select close. Next, select “Finish” to complete the configuration. 
Now, we’re going to start our VM and press any key to boot up the Windows Installer. 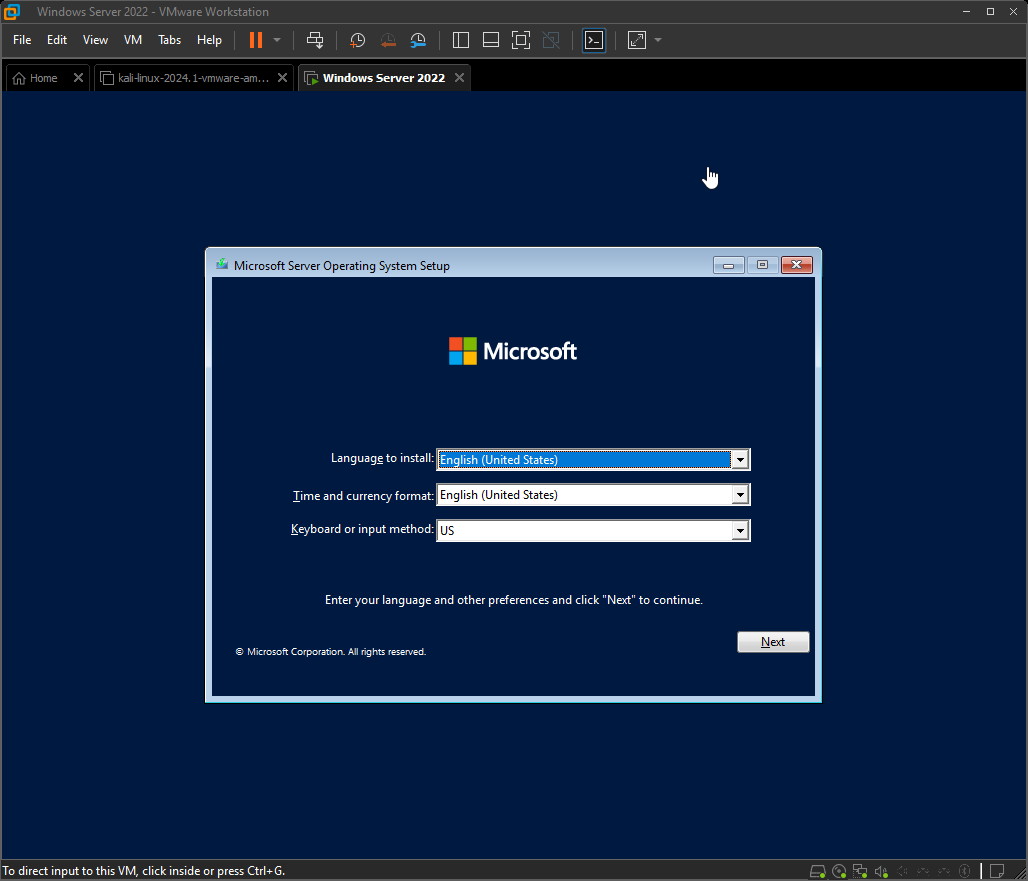
Note: It’s very important that you select the “Windows Server 2022 Standard Evaluation (Desktop Experience)” option. This will allow us to use the Windows Server like a normal windows computer, rather than through a command-line-interface (CLI). 
Select the custom install option. 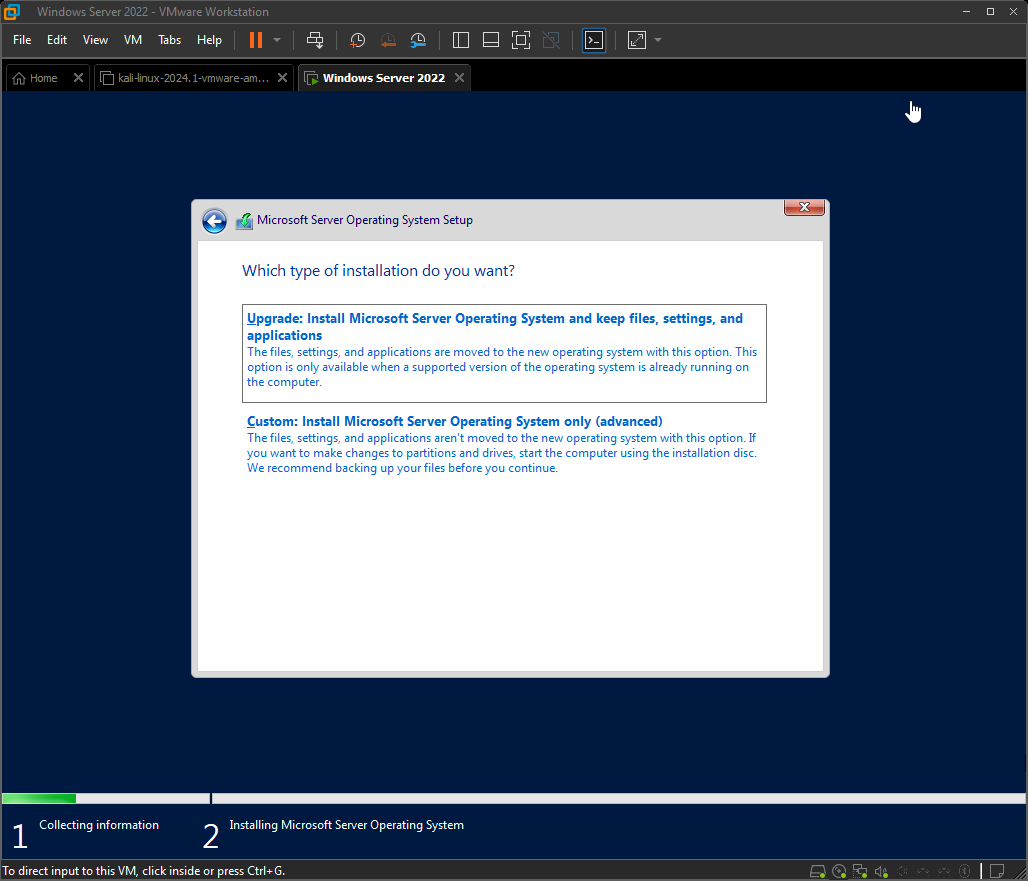
Your 60gb drive that you create previously will show up here. Click next. 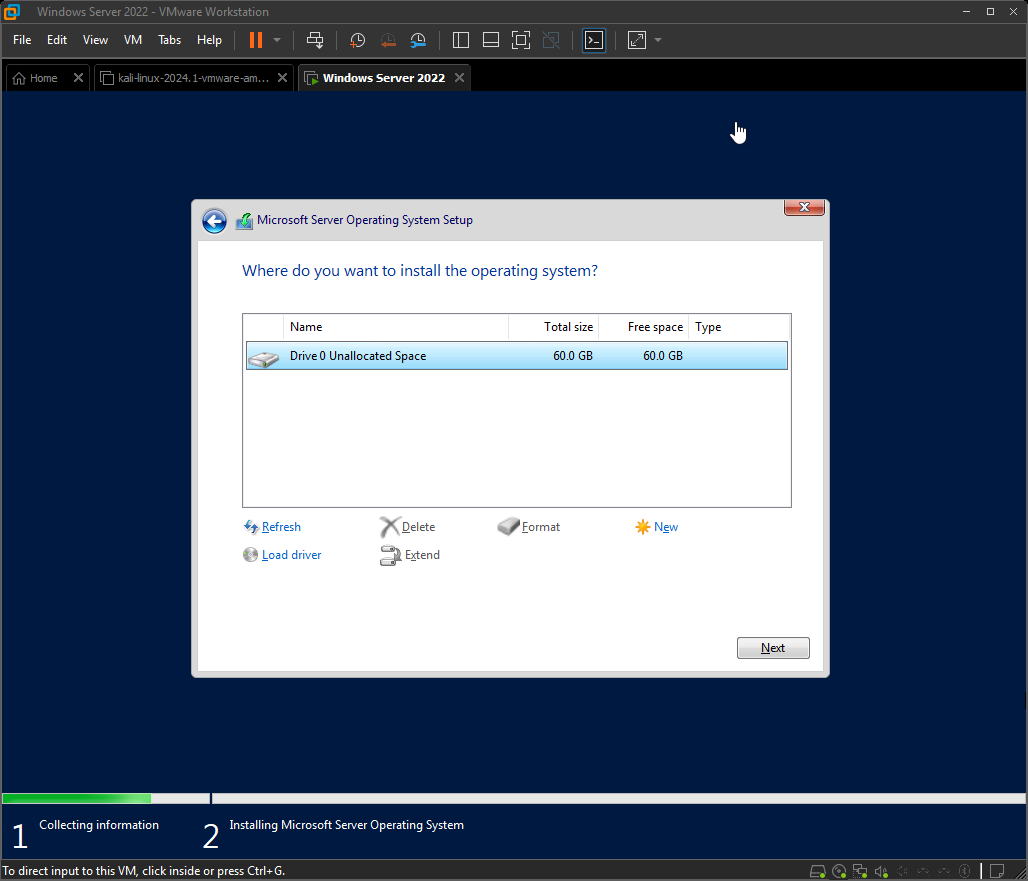
It will now install the Windows Server. This will take a few minutes. 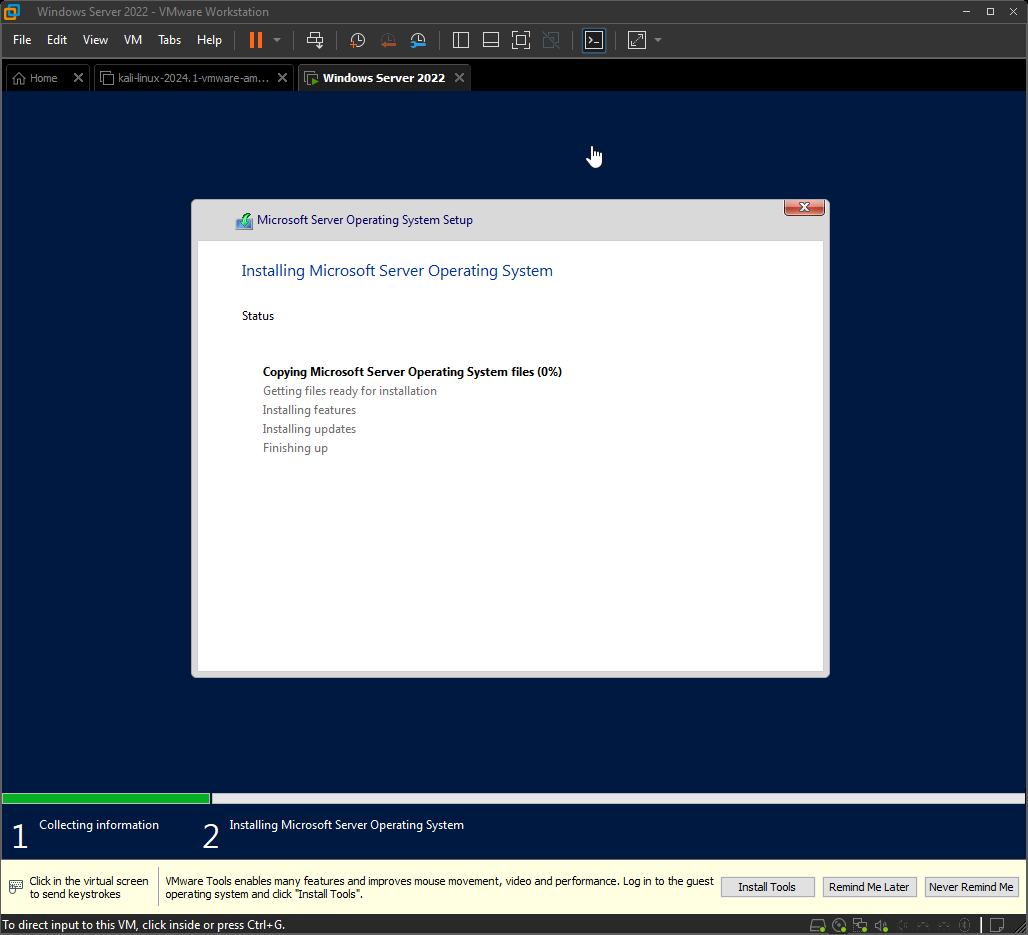
Once the installation is complete, we will be greeted with a new window. Here we will set up our password for the default Administrator account. 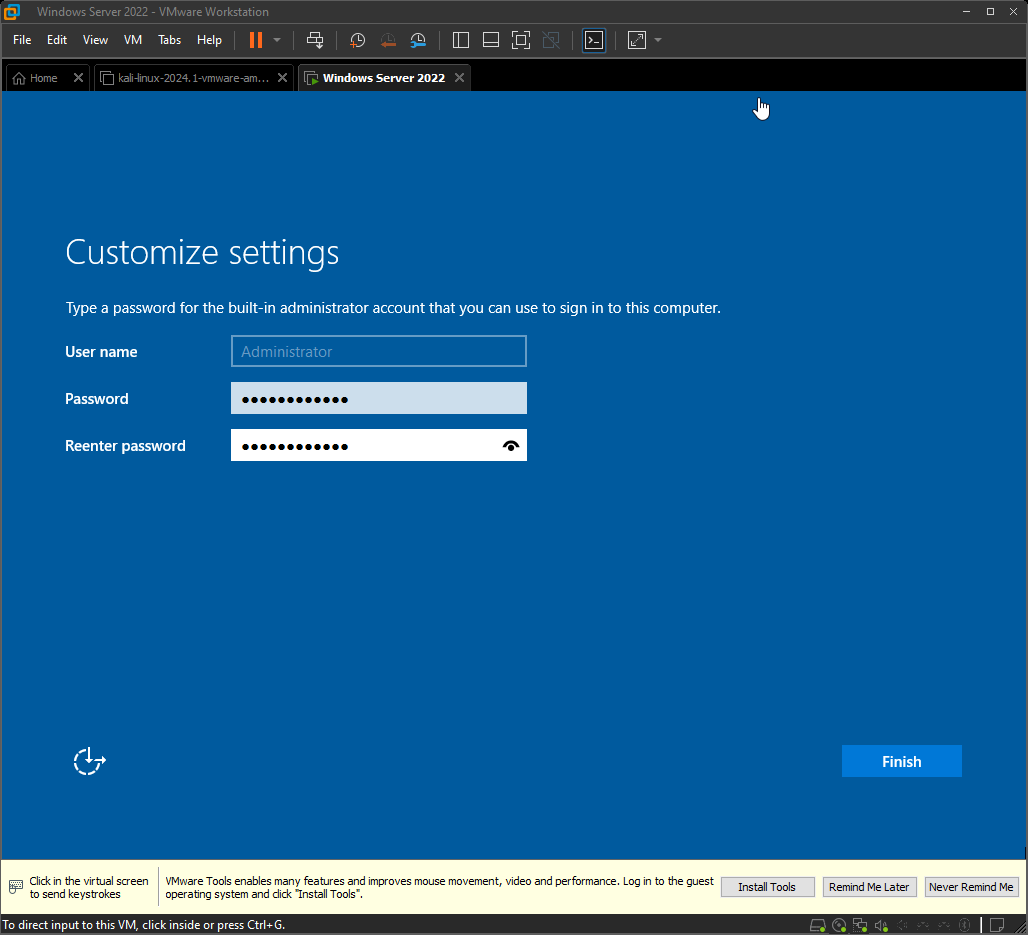
After you are done installing the Windows Server, it’s now time to login for the first time. To unlock the pc you’ll need to hit Ctrl+Alt+Delete. Conversely, you can have VMware send the command for you by going to VM > Send Ctrl+Alt+Del. This is handy if you’re ever setting up a VM without a keyboard. 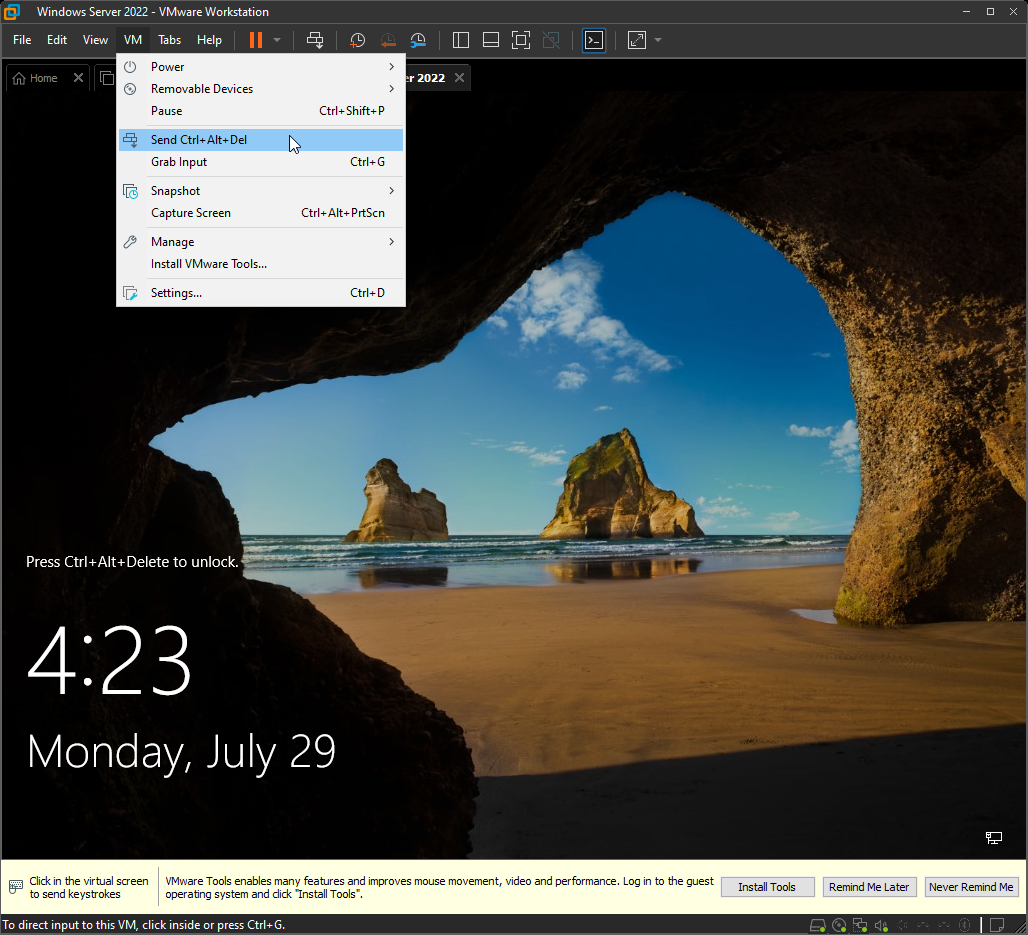
Installing VMware Tools
Once we have successfully logged into our Windows Server VM, we’ll want to install VMware Tools to which is a set of services and components that will greatly improve our experience using the VM. One improvement that it will provide is allowing us to resize the VM simply by dragging the corners to our preferred size.
To install VMware Tools go to VM > Install VMware Tools… 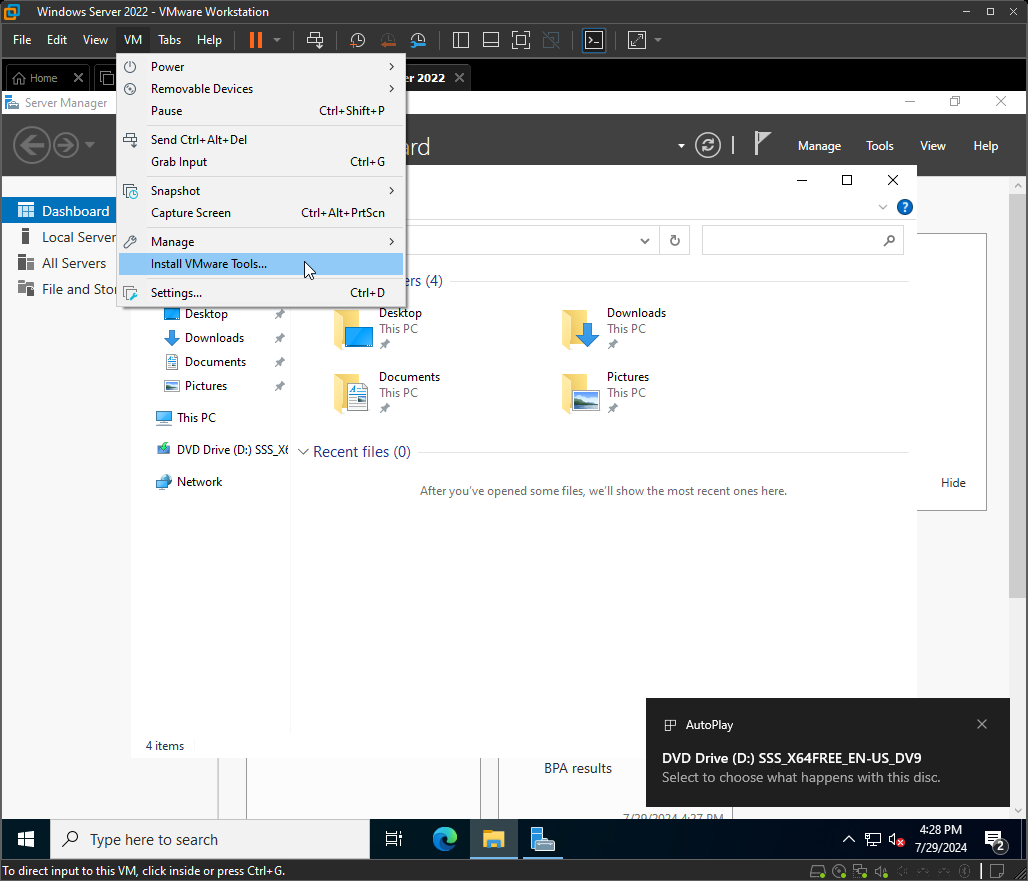
VMware Tools will appear in our virtual DVD Drive (D:). Double click the drive and run the setup64.exe file. 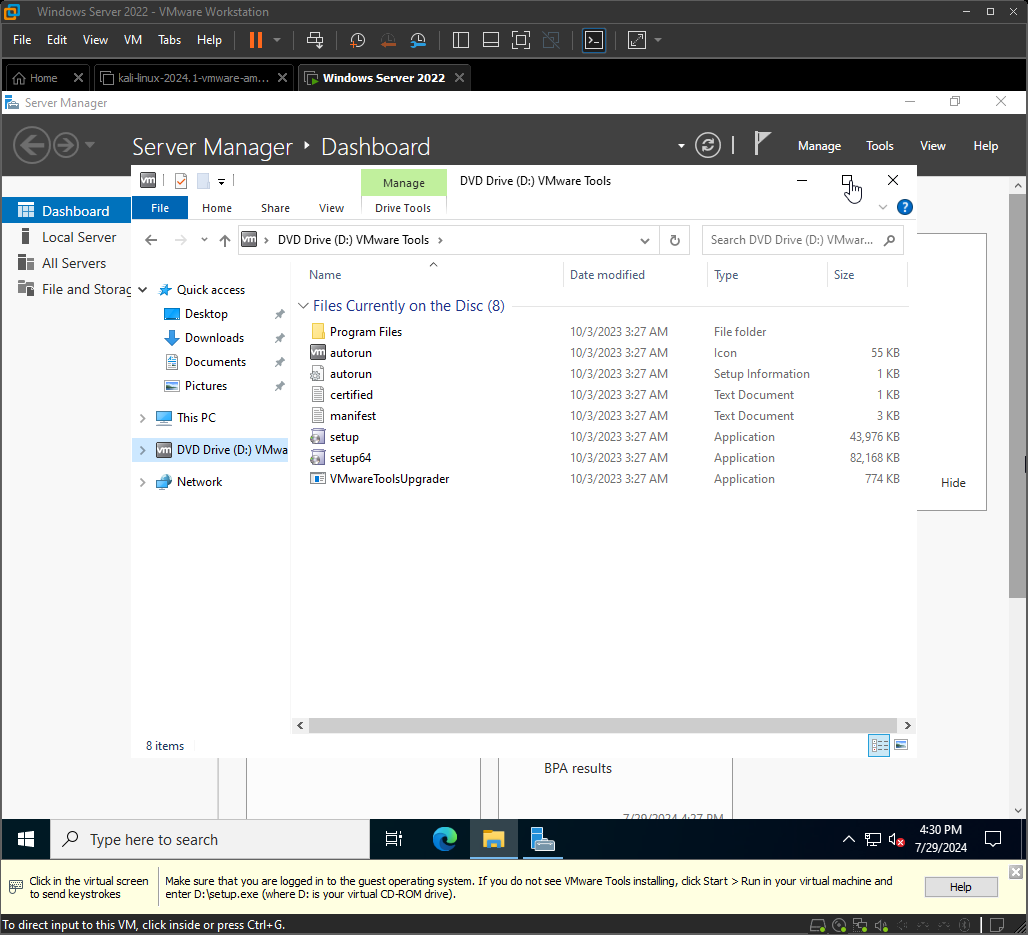
This will open up an installation wizard. Click Next 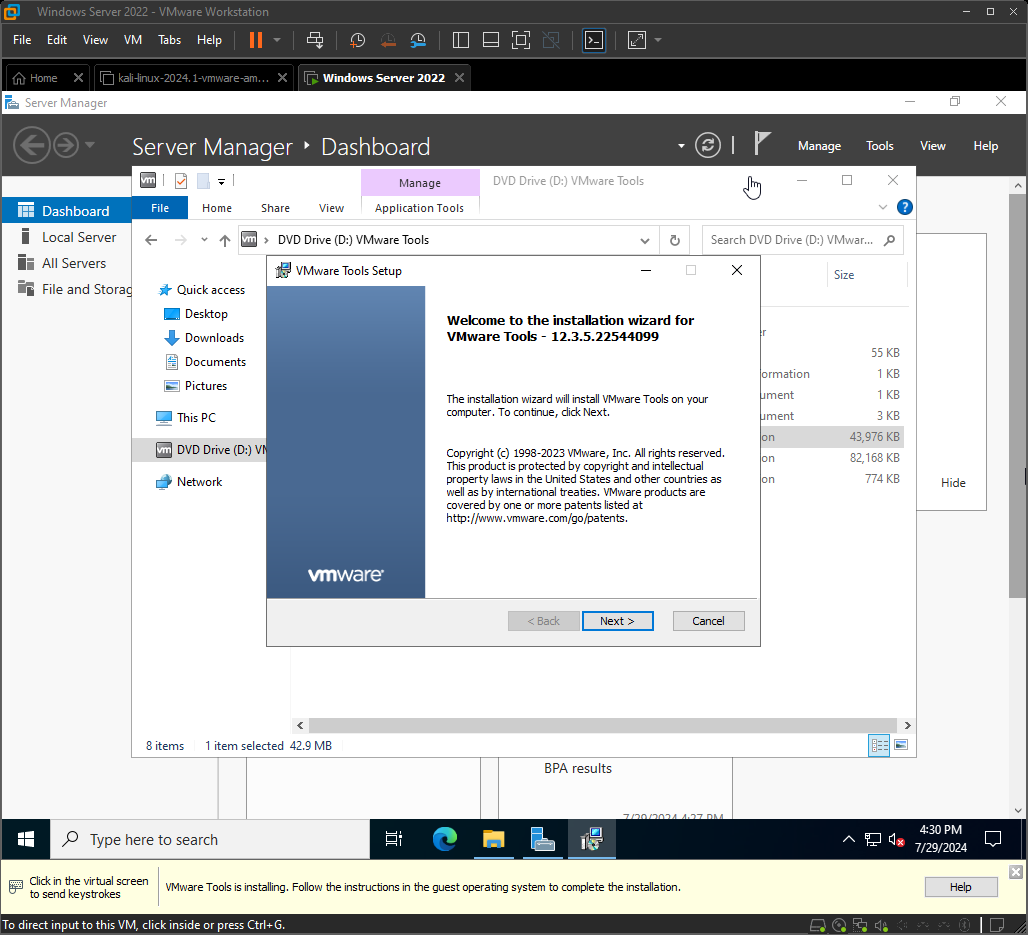
Select “Typical” for setup type and finish the installation. 
Once VMware Tools has finished installing, we’ll need to restart the VM. 
Network Settings
In VMware Workstation go to Edit > Virtual Network Editor
Make sure your Subnet IP is set to 10.0.2.0 and Subnet mask set to 255.255.255.0
When you’re done click Apply

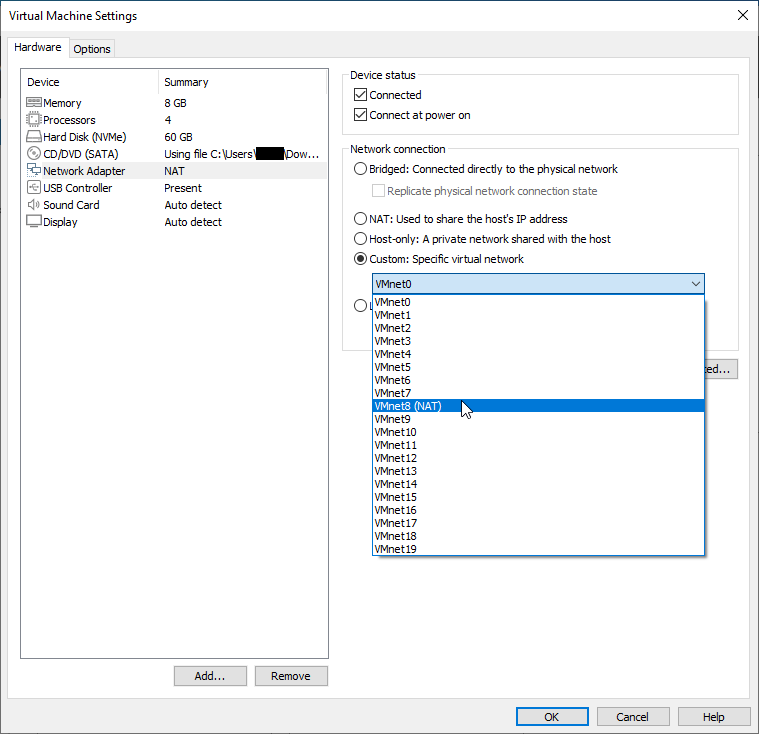
Next, in VMware Workstation go to VM > Settings
Under Network Adapter, select the new virtual NAT network we just created and then hit ok. The subsequent client Windows 11 VM’s that we will create will use the same virtual network.
Setting up Windows 10 Client PC
It is now time to create our Windows 10 client PC that we will eventually connect to our domain. The process to set this up is fairly similar to setting up our Windows Server.
Create a new virtual machine.

Select Windows 10 x64 or 11 x64 depending on what operating system you decided to go with.

Create an encryption password and store it somewhere safe.

Choose your disk size. I went with the recommended.

Click “Customize Hardware.”
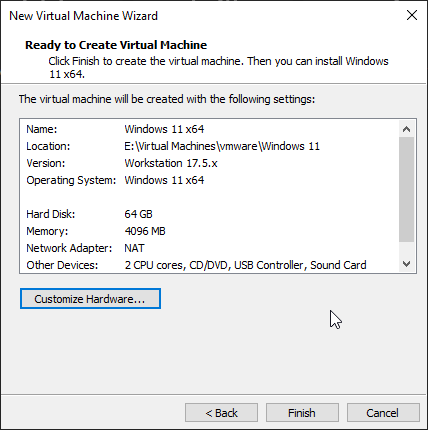
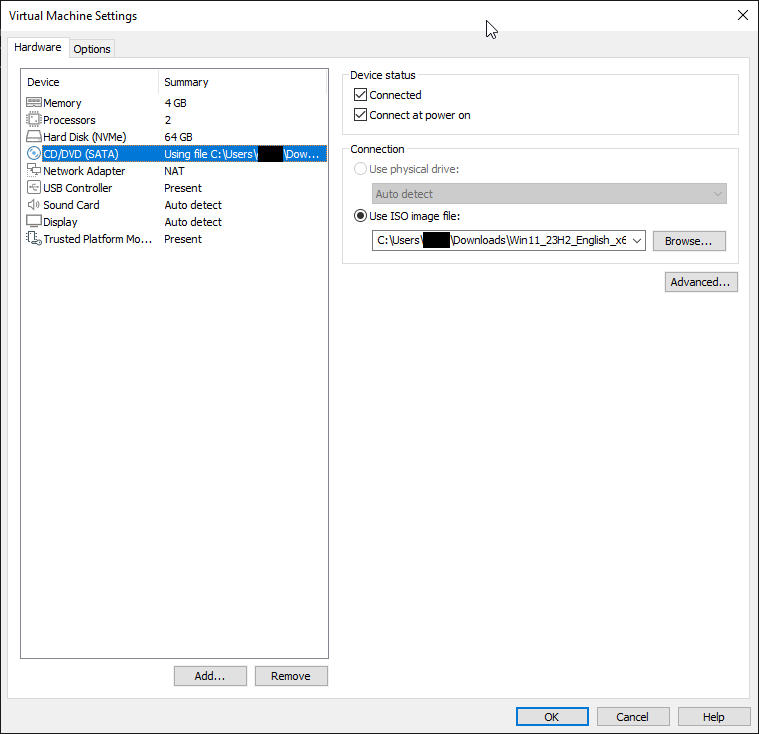
Here we will select the ISO image file for Windows 10 or 11 and we can also configure our memory and number of processors.
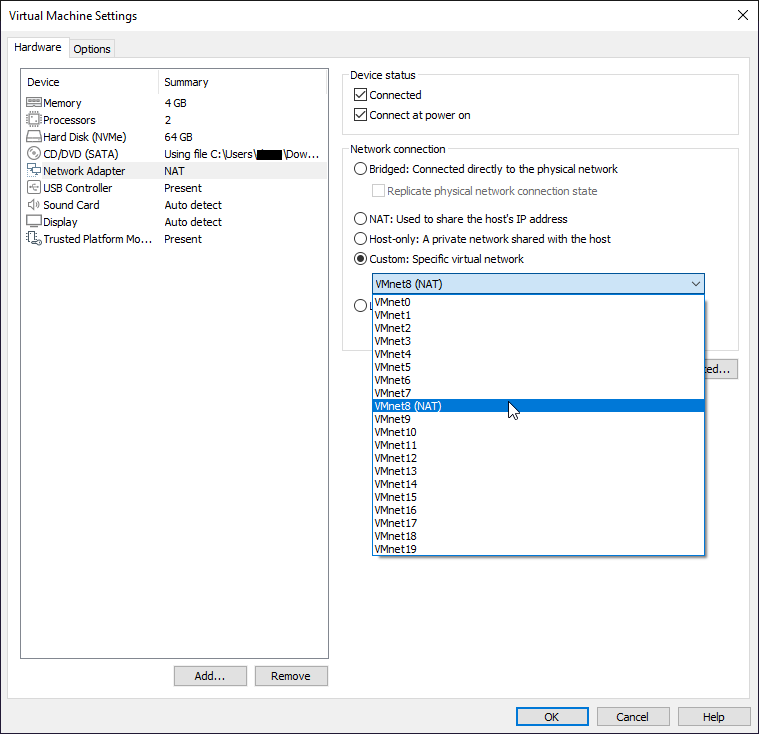
Under the Network Adapter, select the custom virtual network we created earlier. Finish the configuration and start the VM.
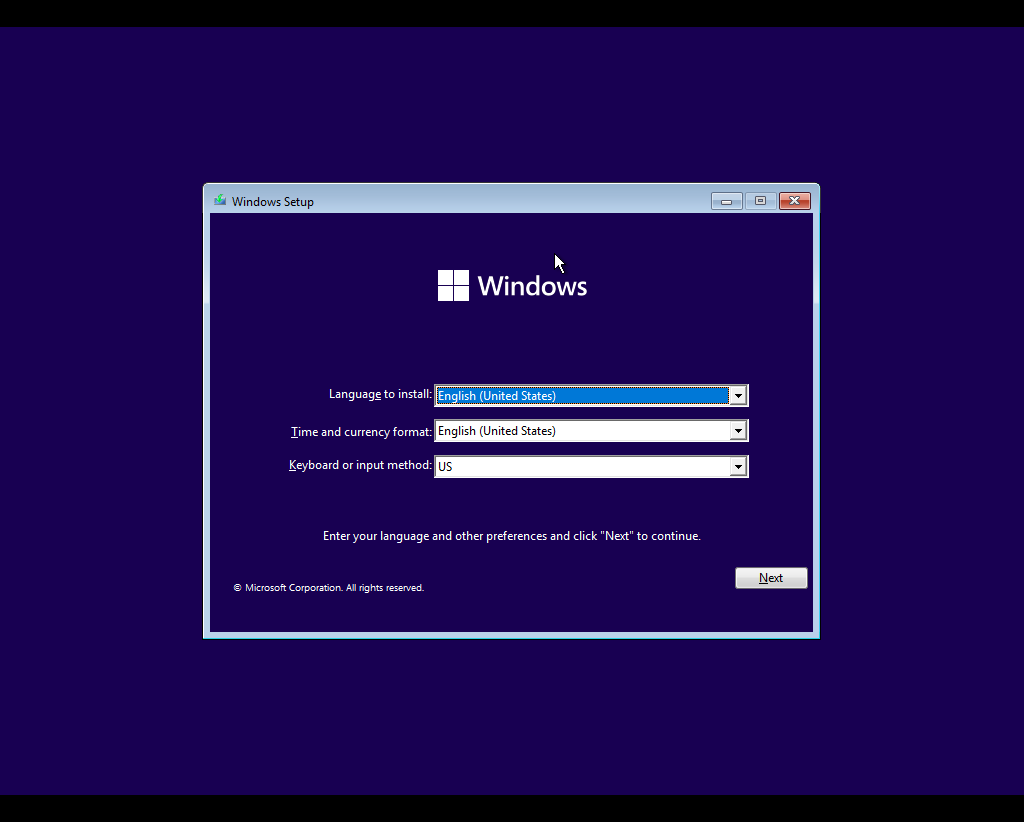
Click Next to start the installation and setup process.
Select “I don’t have a product key.”

Select Windows 10/11 Pro.

Select custom install and continue.

Windows is now installing. This will take some time.

Once we login to the PC we will go ahead and install the VMware tools just like we did for the Windows Server VM previously.
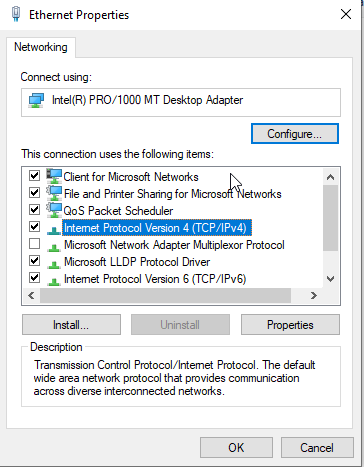
Next we will want to go into our Network Device Properties in order to set our Windows 10 VM’s DNS server to point towards our Domain Controller.

Click “Internet Protocol Version 4 (TCP/IPv4)” and click “Properties”
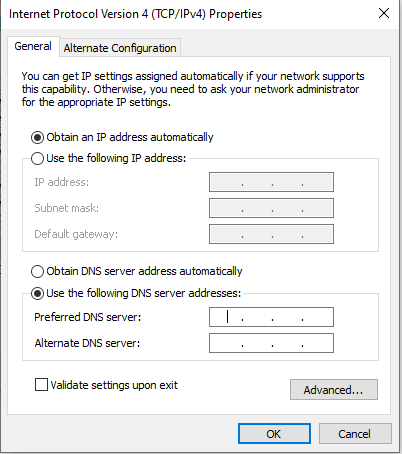
Now, select “Use the following DNS server addresses” and head on back over to the Windows Server 2022 VM.
In our Windows Server 2022 VM we will type “cmd” into the search bar and open up “Command Prompt.” Next type “ipconfig” and hit enter. This will show us our IPv4 address.
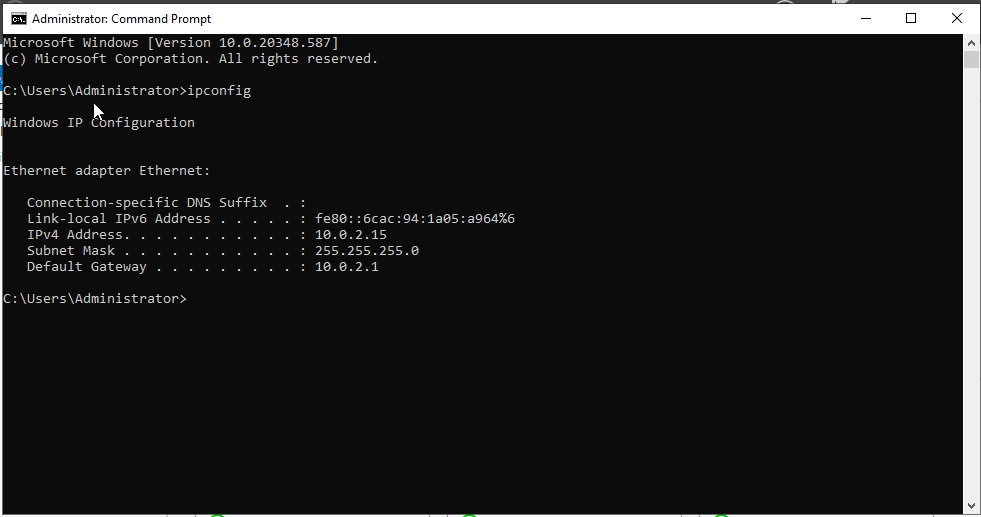
Type the IPv4 address into the “Preferred DNS server” input and add “8.8.8.8” to the “Alternate DNS server.” Then hit “Ok.”

Setting up Active Directory Domain Services
It’s finally time to set up Active Directory Domain Services on our Windows Server 2022 VM.
We will do this through the “Server Manager.” If you don’t have this already open, you can find it using the search bar at the bottom.

In the Server Manager we will start by click “Add roles and features.”
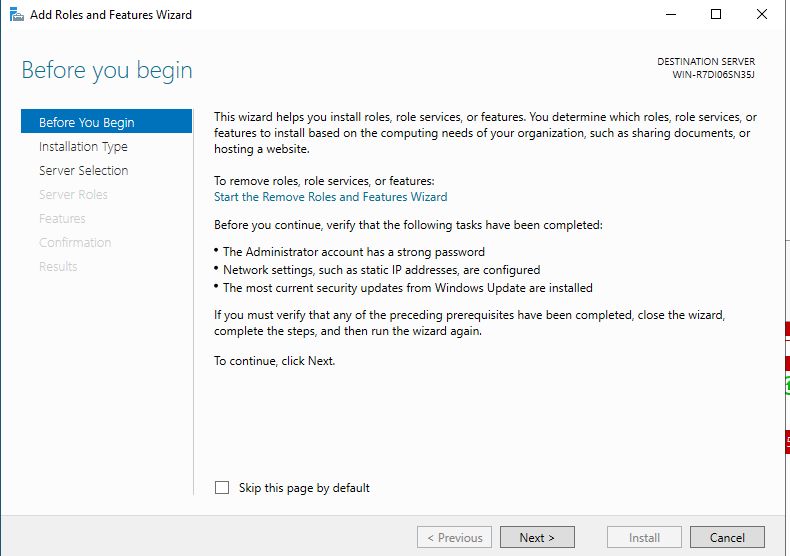
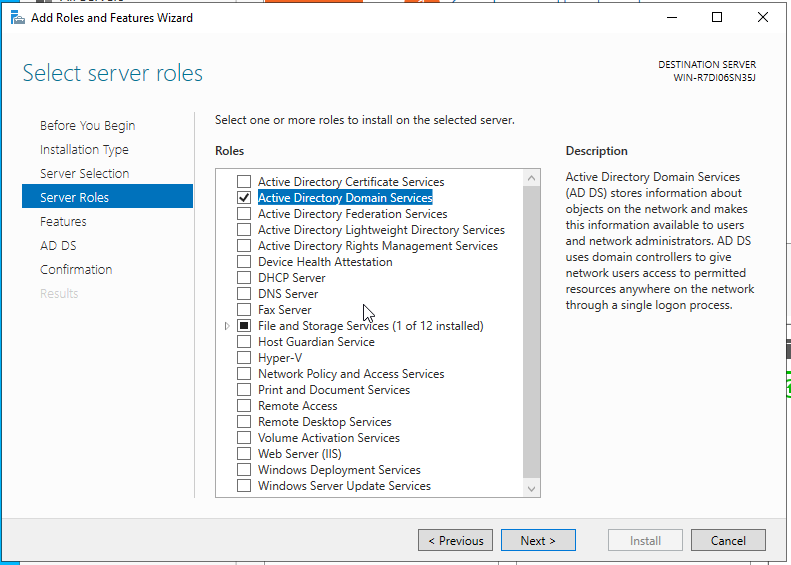
Click Next until you get to “Server Roles.” Here we will want to make sure we have “Active Directory Domain Services” selected.
Once selected, click “Add Features.”

Then click, “Next”
Keep clicking Next until you get to the Confirmation page and then hit “Install”

This will take some time.
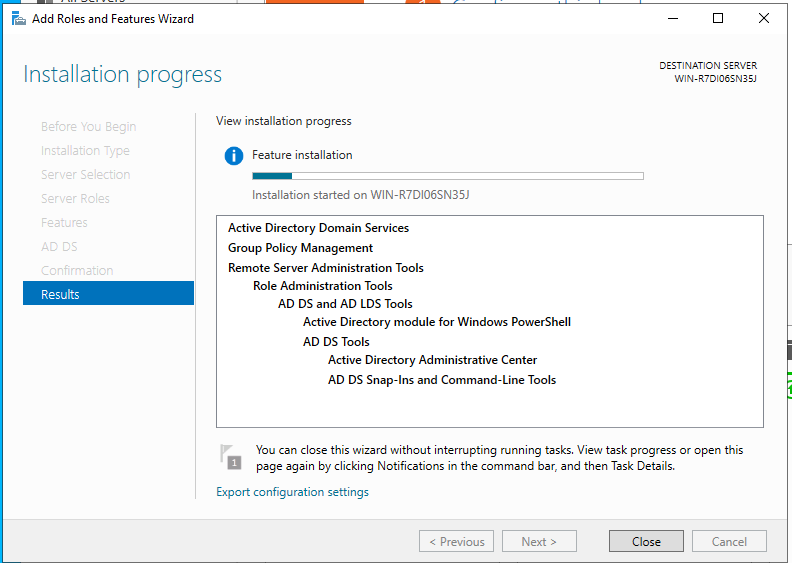
Once it has successfully installed, you can close out of the window.
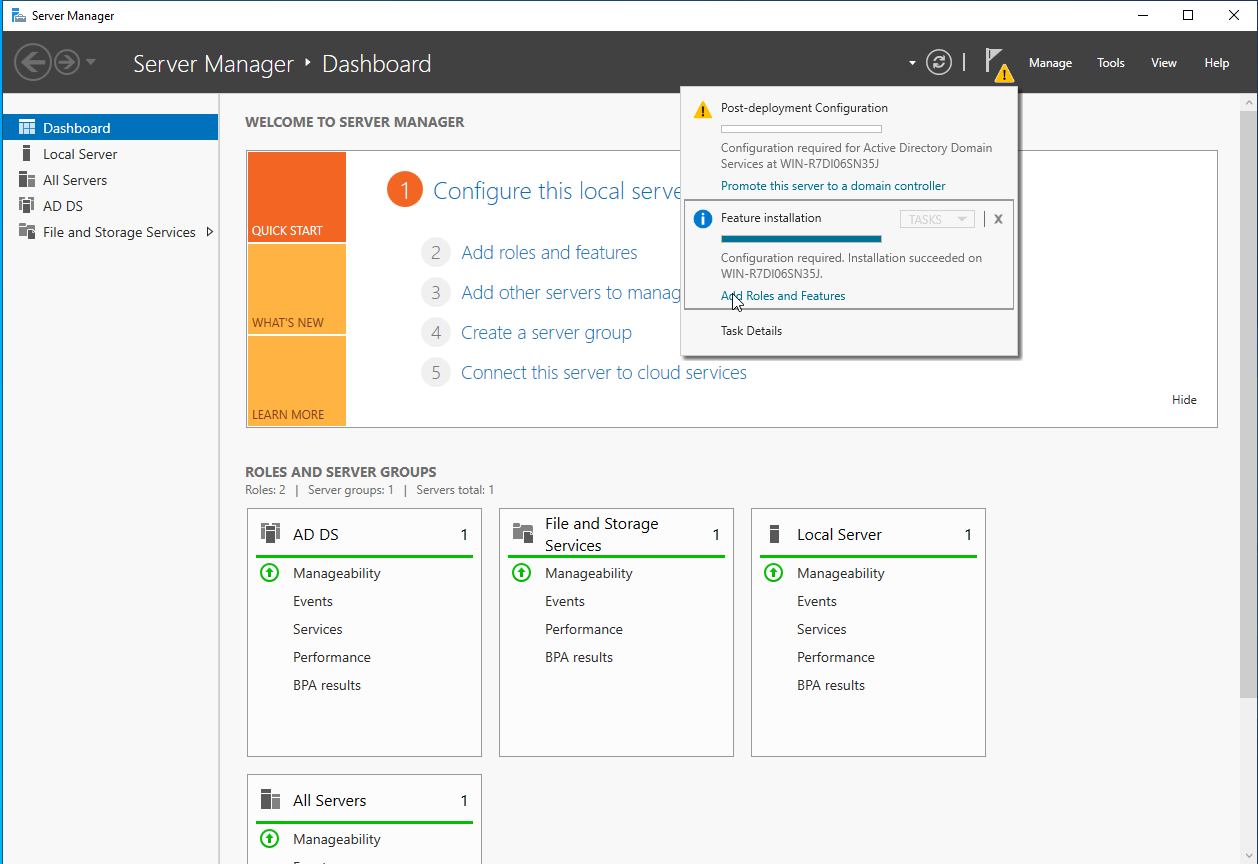
Next, click on the flag at the top and click “Promote this server to a domain controller.”
Click “Add a new forest” and enter any domain name you’d like. I recommend add a .com or .local to the end of it. Other Top-level domains (TLD) should work too, but I haven’t tested those.

Click, next and create a recovery password.
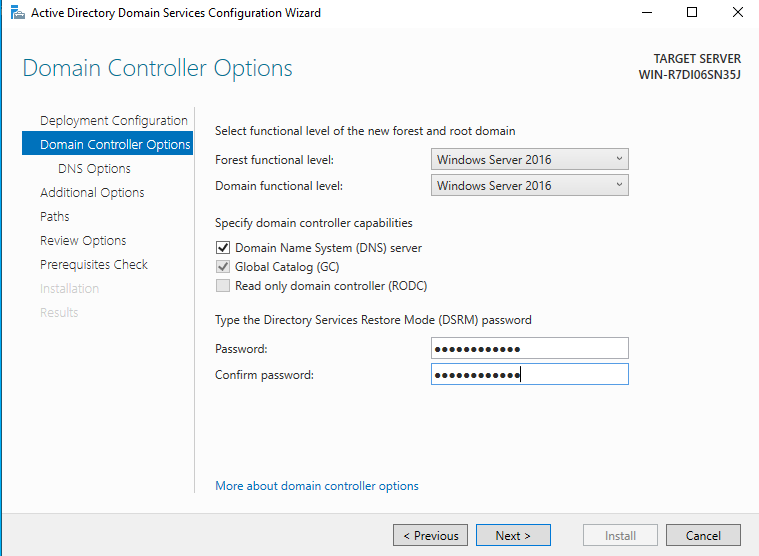
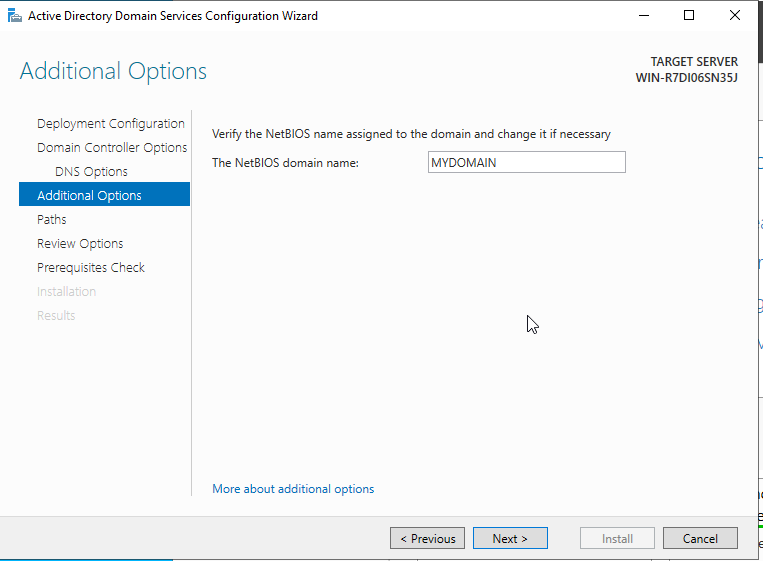
Continue through the menus. A NetBIOS domain name will automatically be generated for you.
Click “Next” all the way through and then click “Install.”

After installation, reboot the VM.
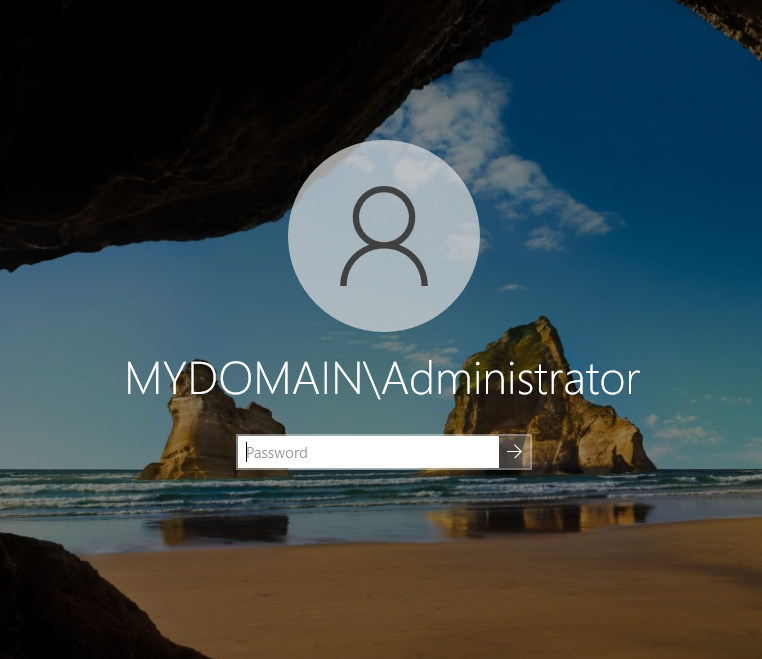
Upon reboot, you’ll be greeted with a new login screen that contains your domain name.
Creating Users
Now it’s time to create our first user in Active Directory.
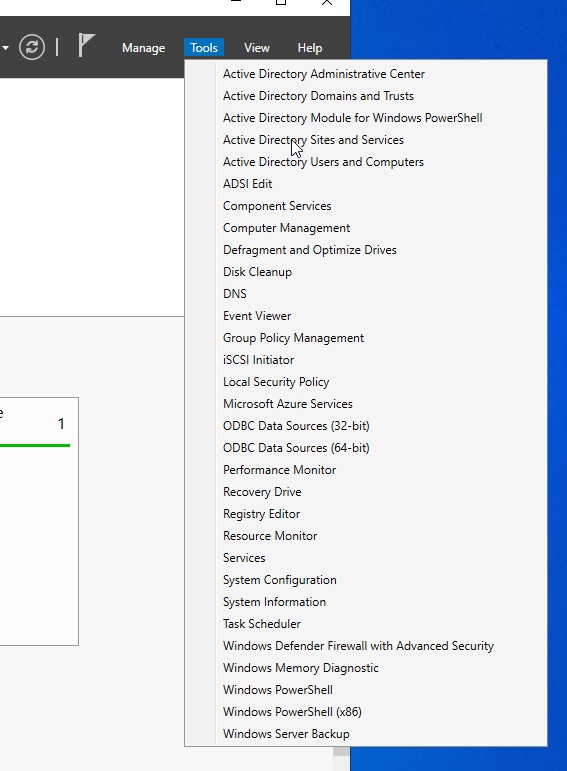
Open up Server Manager if it’s not already open and click “Tools” > “Active Directory Users and Computers”
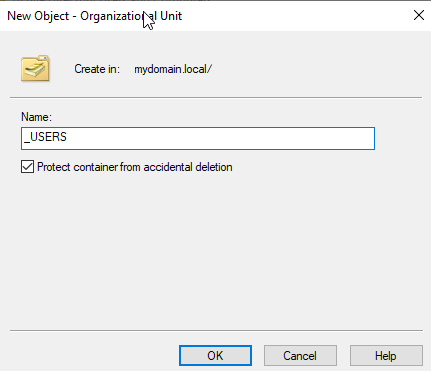
This will open up a new windows where we can manage users and computers. First, we will want to create a new Organizational Unit called “_USERS” and then create a new user within this OU.
To do this right click “mydomain.local” > “New” > “Organizational Unit”

Name it “_USERS”
This will create a new folder under “mydomain.local” called “_USERS” Right click this folder and create a new user. Fill out the information however you’d like.
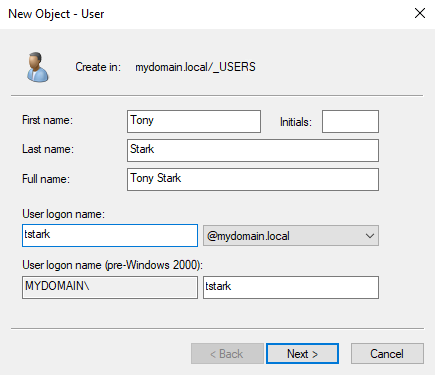
Click Next and create a new password. Make sure you have “User must change password at next logon” unchecked and “Password never expires” checked.

Now that the account is created, we will use it to join our Windows 10 VM to our domain so that our domain has full control over the user and computer.
Joining Host to the Domain
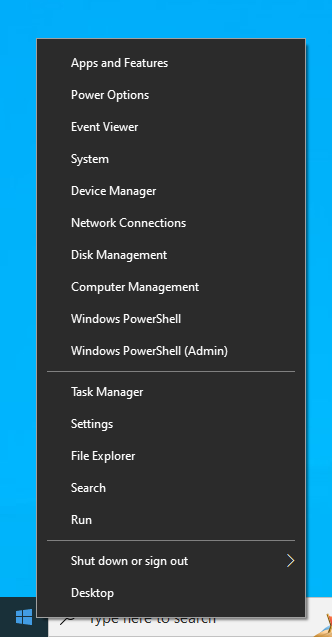
Before joining the Windows 10 VM to the domain, the first thing that I like to do is to rename the PC to something more easily identifiable. To do this right click the start button and click “System.”
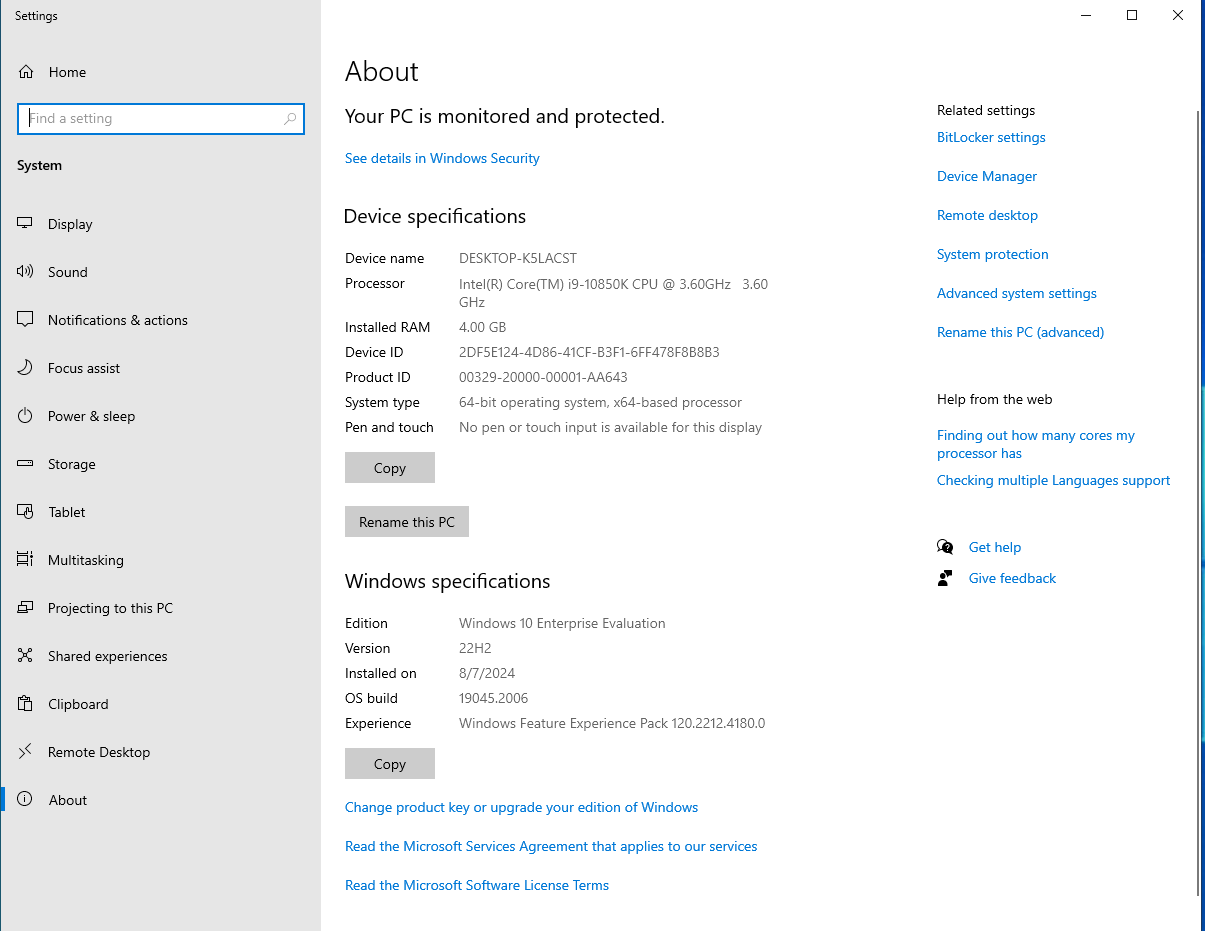
I renamed the PC to “USER-PC1,” but you can pick a name of your choosing.

Renaming the PC will require a system restart.
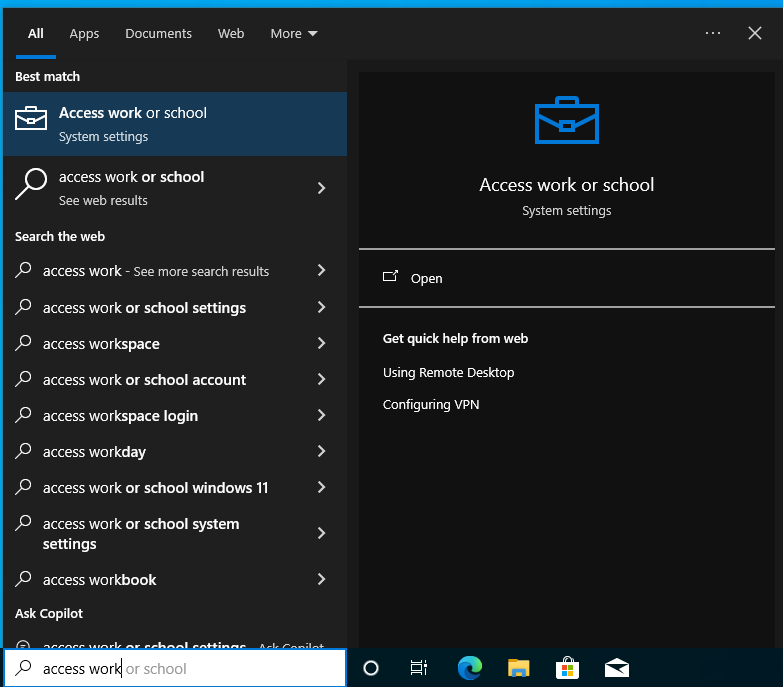
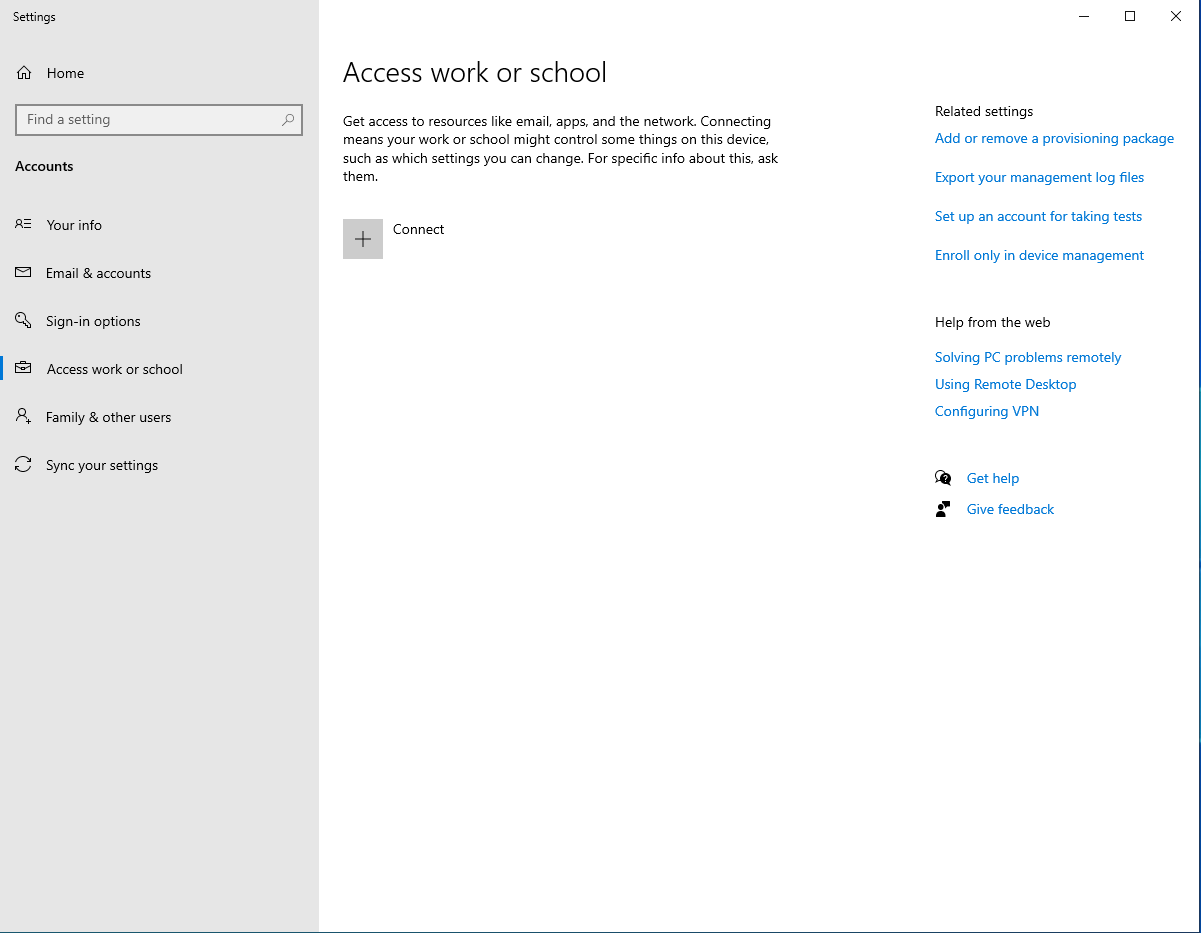
Once you’ve rebooted, go to the search bar and type “Access work or school” and click on the first option.
Click Connect
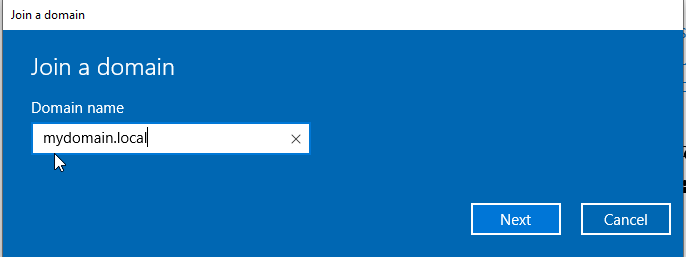
A new windows will pop up, click “Join this device to a local Active Directory domain” at the bottom.

Type the domain name you created earlier and click next.
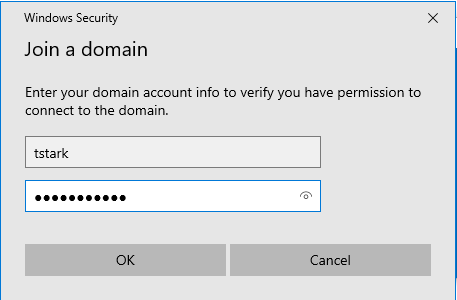
This is where you’ll type the information of the user account we created earlier.
This will be a standard account.
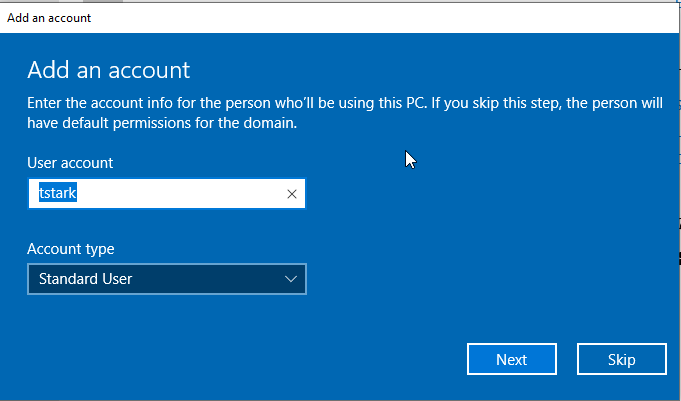
You will be prompted to restart the PC.
Upon restart, the computer will have successfully joined the domain and you can login with the new user that you had created.

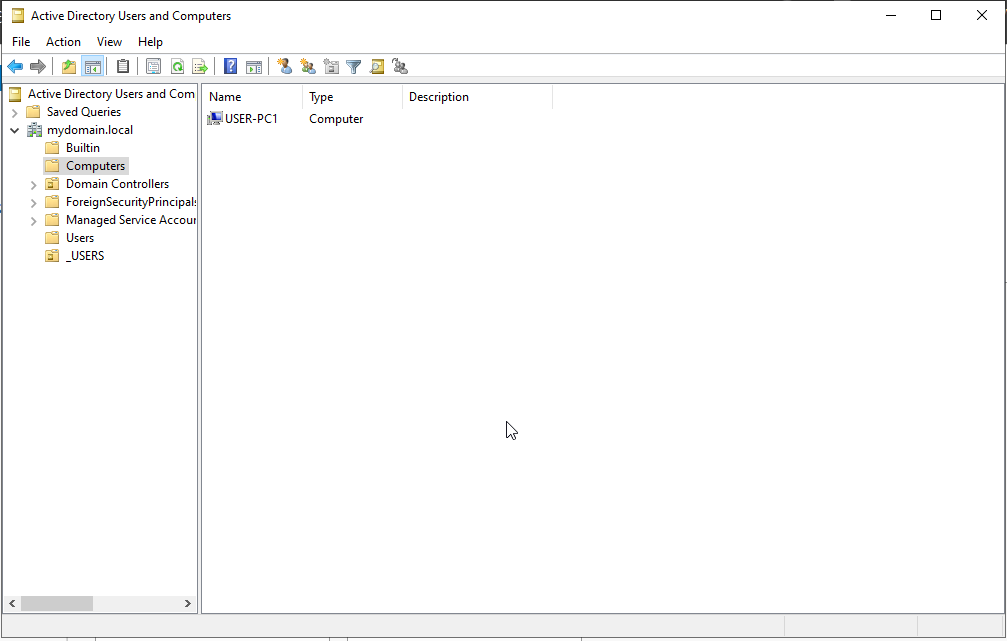
If we check Active Directory, we can see that our PC “USER-PC1” now appears under “Computers.”
Congratulations! We have successfully set up Active Directory, created our first user, and joined our user’s PC to the domain!